Were you surprised when you first heard about the “No Surprises Act”? We were. I’d like to be able to tell you that we have been actively tracking and planning for this legislation since it was first issued on October 7, 2021. Unfortunately, that’s not the case. However, we got lucky because we were already working on a new tool called Custom Forms which, when it launches (est. Feb 2022), will work beautifully in helping you comply with this bill in ways that are easy, HIPAA compliant, and will give you a significant amount of automatic documentation and tracking. Note: Since the Custom Forms tool is still in production, some of the screenshots below may differ slightly from the actual tool. We’re still researching this legislation, and will make modifications as necessary.
Using a Custom Form to create a good faith estimate is a two-step process. The first step is to create the form in PSYBooks. That’s a one-time task. Once the form is created, the second step is to disseminate it to your patients. We’ll cover each step separately:
Creating the Form
The first step is to create your Good Faith Estimate as a PSYBooks Custom Form. You write your form. We don’t do this part – it’s up to you to create the good faith estimate form you want to use for your practice. However, there are some excellent tips in this article: New billing disclosure requirements take effect in 2022 under the sub-heading “What information should the good faith estimate contain?” There are also some pre-built forms that are available. Although some can be used right out of the box, I tend to feel that those that are set up for your customization are a bit more reliable. In my mind, the authors of those types of forms have done their homework on what this bill actually requires. It doesn’t seem to be a “one-size-fits-all” kind of thing.
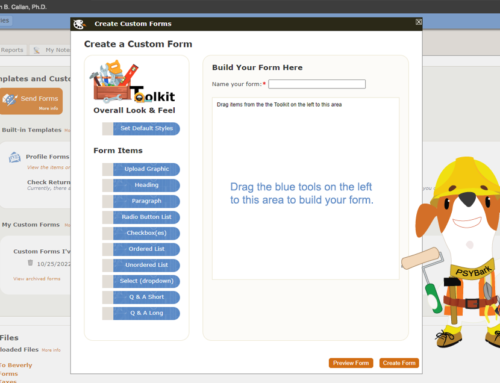
Once you’ve decided what you want your form to say, our tool for turning it into a digital form looks like this:
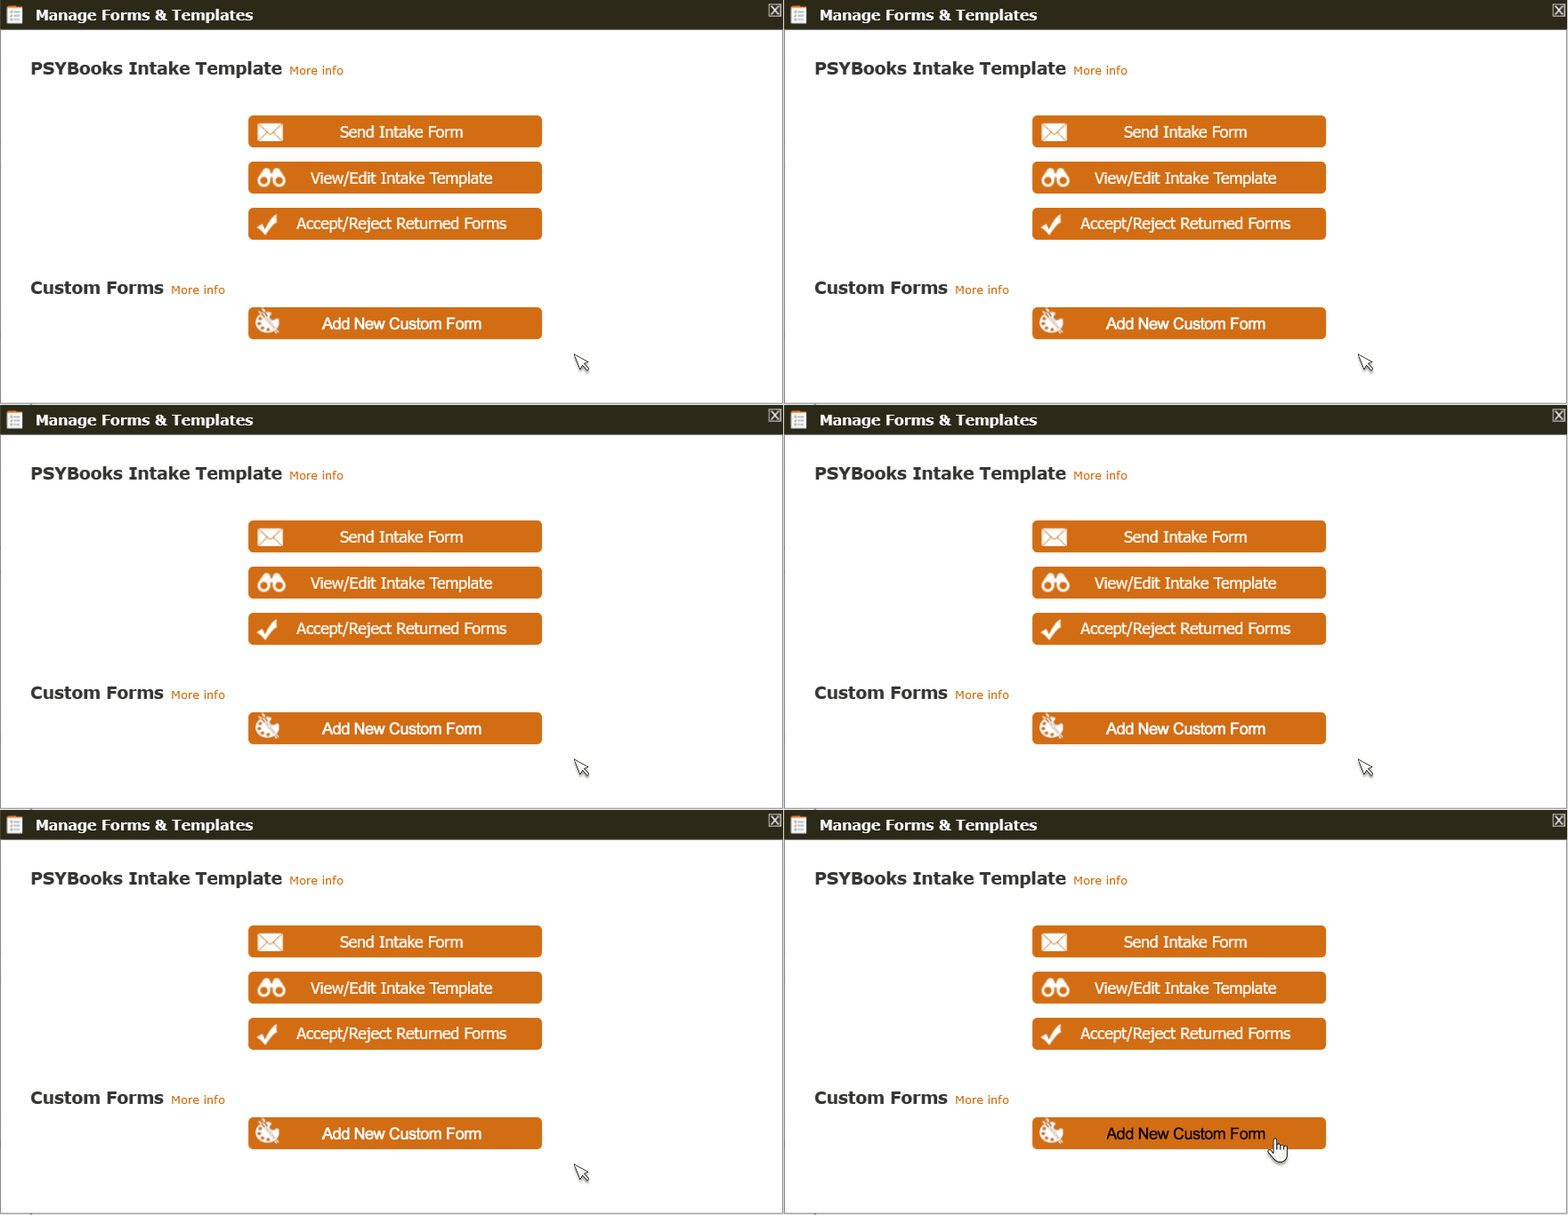
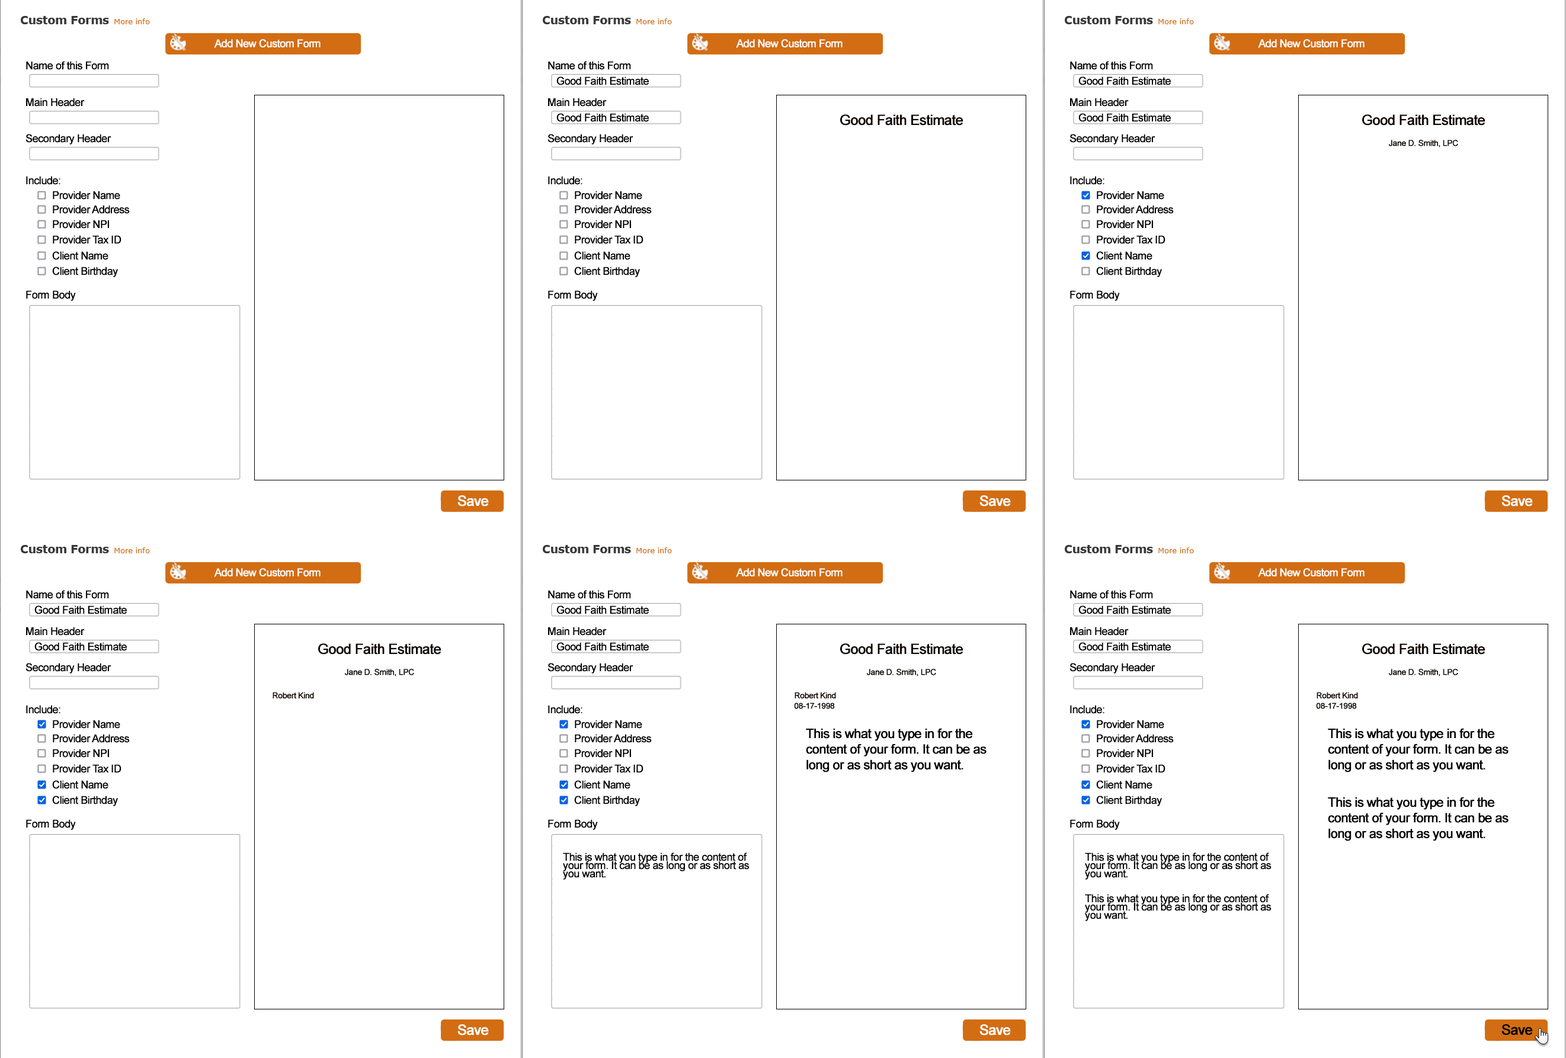
When the Add New Custom Form tool opens, you’ll see a screen similar to the one below. The top item asks you to name the form. The name of the form will help you identify it and will also be used as the subject line of the email you send your client. After that, there are a variety of other items you can choose to add or not. Notice that if you want any of the items under “Include” to be on your form, you just check a box. You don’t have to type that information each time you need to send a Good Faith Estimate. Since we already have this information in your account, we can add it for you. In the “Form Body” section, you can type directly into the form or copy/paste. You see a preview of your form on the right, as soon as you type entries on the left. When you’re satisfied with your form, click “Save.”
Disseminating the Form
When you click “Save,” the form above closes and your new form is added to a table in the Custom Forms area:

Now that your form is saved, we’re ready for the next step, i.e., how do you get the form to your client? Here’s how:
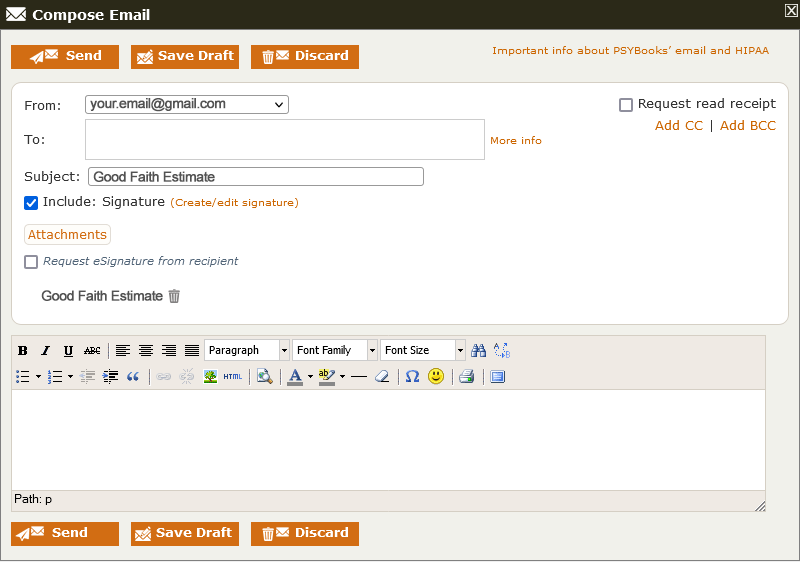
When you click the email icon in the table beside your Good Faith Estimate form, a Compose Email window will open. That window will have your Good Faith Estimate Custom Form attached, your email address will be in the From box, and the Subject of the email will be filled in with the name you gave your form. All of that is done for you. Your entire list of contacts (patients, staff, groups, etc.) is listed in the Select box that drops down when you click the box beside “To,” allowing you to easily select the client this particular estimate is for. Notice that you can also request a read receipt and ask them to eSign the document.
In the body of the email, you’d type your actual estimate – however you want to word it for this particular patient – then click “Send”:
The client is notified via regular email that they have an email in their Portal. When they sign in, they see your Good Faith Estimate email at the top of their Inbox:
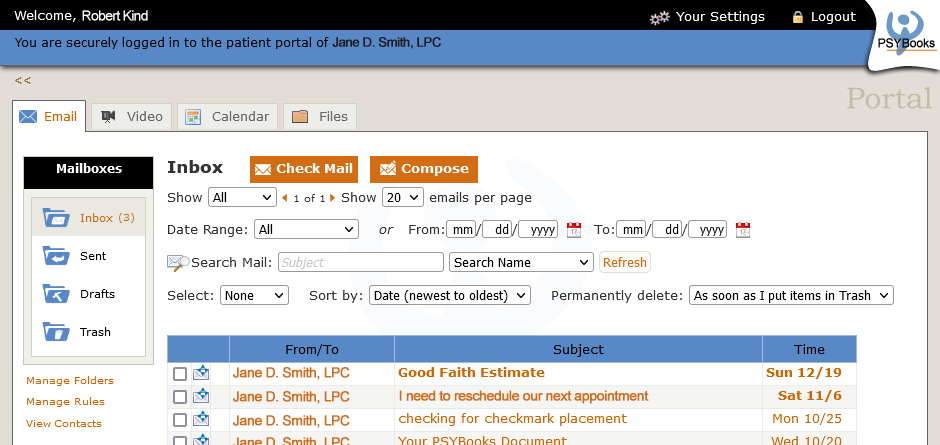
When they open the “Good Faith Estimate” email, they can read their estimate and click a link that takes them to their Files tab of their Portal where the Good Faith Estimate form appears in the Received Files drawer of their Filing Cabinet:
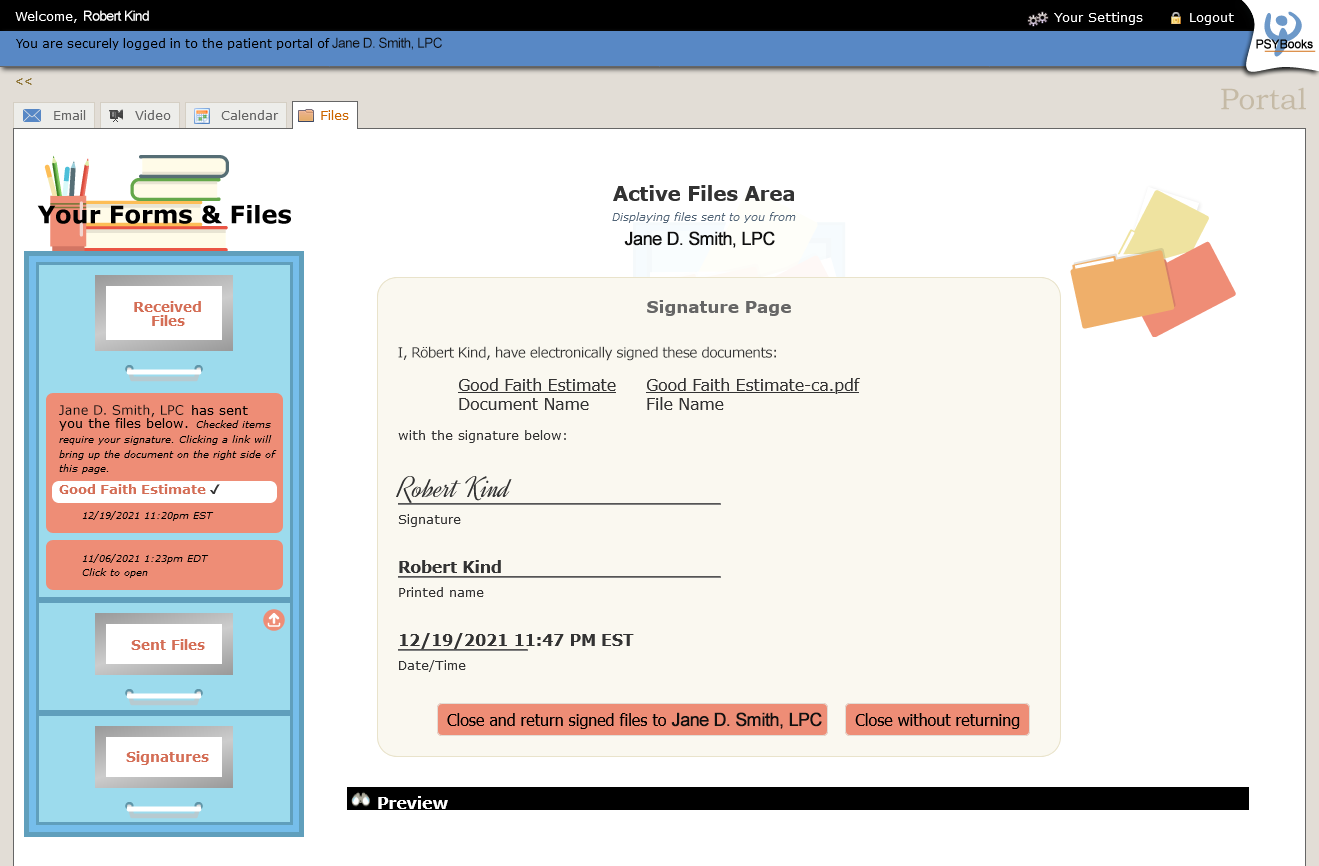
Your Good Faith Estimate will be sent as a PDF, which means they’ll be able to use the PDF Preview Tool to view it (the Preview tool has been cropped in the screenshot above, but the PDF would appear where you see the black bar that says “Preview”). If you’ve requested an eSignature, your client can sign it on this page and return the signed document to you.
Tracking: the Paper Trail
The tracking for this entire procedure is extensive and you don’t have to do anything to enable it. It all happens automatically, behind the scenes. Many of the steps below have system-generated time/date stamps added to the transactions for further proof of documentation. Here’s the list of the automated processes that track your form:
- On the client end, the signed PDF they just returned to you now appears in the Sent drawer on their Files tab.
- Both you and the client are notified via email that they have returned a document to you.
- On the therapist side, you’re notified on your Therapist Notification Tool (TNT).
- Additionally, one copy of the signed, returned PDF is put in the Files tab of the patient’s chart in your PSYBooks app to become part of their official medical record.
- Another is put in your “My Files & Templates” tab so you both retain a copy.
- You and the client also have copies of the entire email exchange in your Email tabs. Since PSYBooks has threaded email with individual folders for each patient, if you had any back and forth communication about your estimate, it will all be there in your respective Portals. All emails are automatically saved within PSYBooks as part of the medical record.
- Finally, there’s a record of each transaction in your Activity Log, again with time/date stamps on each step.
Between Now and Then
The only drawback to the above is that you need this by early January and our proposed launch date is Feb. However, between now and then, you can write your form and send it as an attachment via our encrypted email system. That should give you adequate tracking and documentation – it’s just not as easy and automated as it will be when Custom Forms launches. We’re excited about it!


